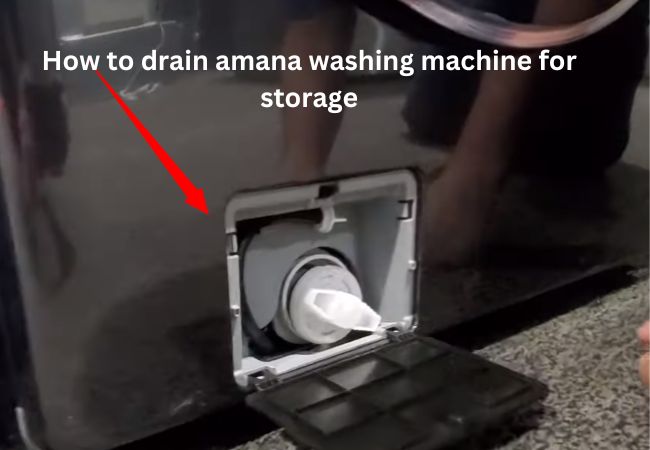
If you want to store or move your Amana washer, drain the washer first to prevent any damage or mold growth.
But how to drain Amana washing machine for storage? Don’t worry, we will get you covered!
To do it, follow these steps:
- Disconnect the machine from power,
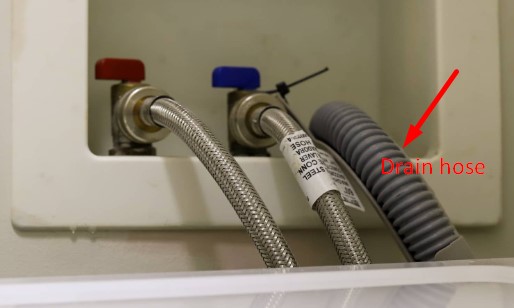
- Locate the drain hose,
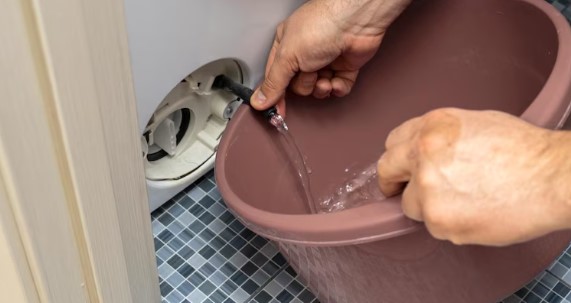
- Position it over a drain or bucket,
- Remove the cap, and let the water flow out until empty.
In this post, we’ll discuss each step in detail to drain your Amana washer for storage and help you prepare your machine for long-term storage.
How to drain amana washing machine for storage
Draining water is a common and essential task when you plan to store it for an extended period or move it.
There are two primary methods to drain water from your washing machine:
- Manual Drain: This method involves physically removing water from the machine using a bucket or hose. It’s effective but can be time-consuming for large loads.
- Built-in Drain Pump: Most modern washers come equipped with a drain pump that expels water automatically. We’ll explore both methods in detail.
You can perform these methods for both top and front-loading washing machines. We’ll guide you through the process so let’s start:
Unplug your washer and then locate the water supply valves from the wall behind or beside the machine.
Turn off both the hot and cold water supply valves by turning them clockwise until they are in the off position. Another hose is a drain hose.
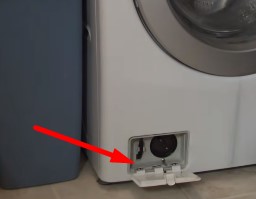
Some front-load washers contain a single drain pump filter and some have a drain pump filter with a drain hose. You may find it at the bottom of the front panel.
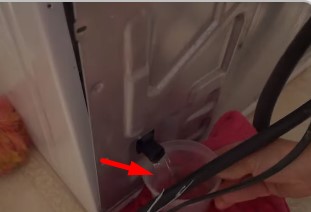
In your top load washer, the drain hose is located in the back of the washer.
Drain the Water manually
Front-load: For the drain pump filter only, place a towel or tray under it to catch any residual water that may spill out.
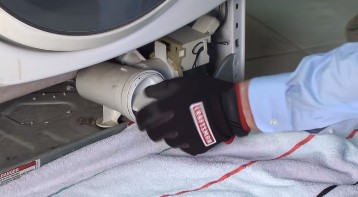
Then, use a screwdriver or your fingers to open the access door or panel covering the drain pump filter. Carefully unscrew the drain pump filter cap in a counterclockwise direction.
For the pump filter and tube, unclip the hose and remove the filter’s cap.
Top load: Detach the drain hose from the pipe and place a towel or pot under the hose.
Drain the water with a built-in drain pump
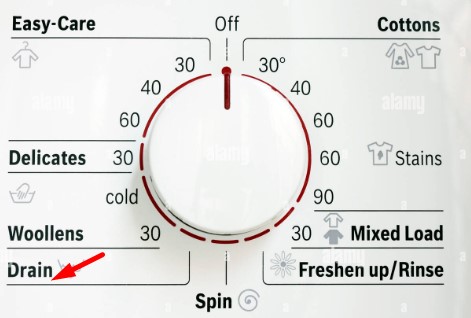
Activate the Drain Pump
With the panel open, you’ll likely find a knob or lever that allows you to activate the drain pump. Turn it to the “drain” or “pump” position.
Wait for Automatic Drainage
The built-in pump will begin expelling water from the machine. You won’t need to do anything other than wait for this process to complete. It’s typically faster and more convenient than manual draining.
Return to Normal Mode
After the pump has removed all the water, turn the knob or lever back to its normal operating position.
After draining water using any of the above methods, go to step 4.
Take out the filter and check it for debris, lint, and foreign objects. Clean the filter thoroughly.

If there is still water in the drum, gently tilt the washer forward to allow any remaining water to flow toward the drain pump filter. This can help remove any excess water.
Leave the lid open for a while to allow the interior to dry completely. You can also wipe down the interior surfaces with a clean, dry cloth to remove any moisture.
Bundle up the power cord and any water supply hoses, securing them with twist ties or Velcro straps. This helps prevent damage during storage and makes it easier to reinstall them later.
Store the machine in a cool and dry place away from direct sunlight.
Final thought
So, we hope you have got covered on how to drain amana washing machine for storage. This tricks would be handy when your Amana washer is leaking.
When you decide to store or move the amana washer, drain the water completely to prevent mold growth or any damage.
Leave a Reply