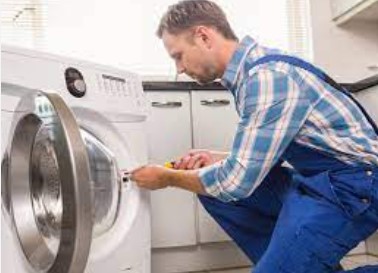
Do you need to replace your tub bearing or any repairs to your Amana washer? If so, you just need to remove the drum to access the bearing.
But what I can do for my Amana washer drum removal?
Don’t fear, whether it is your top or front-load washer, we’ll let you know the process in simple steps.
To get it, scroll down slowly!
Why do you need to remove Amana washer drum?
We’ll be here to teach you the exact process for your Amana washer drum removal. But before you should know why you might need to do it.
Over time, washers can develop issues like strange noises, excessive vibrations, or even leaks.
In such cases, accessing the drum becomes crucial for inspection, maintenance, or repair.
Even if you need to replace bearings or belts and identify and clear blockages in the drain system or water inlet, you should access the drum.
Also, your Front load washers benefit from drum removal for thorough cleaning, preventing mold and mildew growth.
So, because of the above reasons, you need to remove the drum regularly and clean it.
In the below sections, we’ve covered the Amana washer drum removal method for both top-load and front-load washing machines.
Top load Amana washer drum removal
When you want to remove the drum from your Amana top load washer, follow the steps we’ve covered. Yet, the steps may slightly vary depending on your used model:
Step 1: Prepare the Workspace
Move the washer to a location where you have enough space to work.
- Lay down a blanket or drop cloth to protect the floor and the washer’s finish.
Step 2: Disconnect the Power and Water Supply
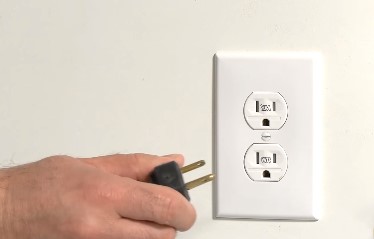
Disconnect the wires connecting the motor and other electrical components.
- Disconnect the water inlet and drain hoses.
Step 3: Remove the Top and Control Panel (if applicable)
Some Amana washer models have a removable control panel and top panel that need to be taken off.
- Pry it open gently using a flathead screwdriver.
- These panels may generally be held in place with screws or clips. Remove them to access the internal components.
Step 4: Detach the Cabinet
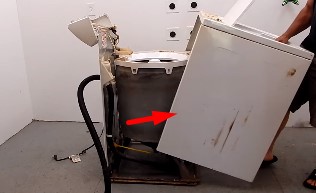
Once the control panel is off, locate and unscrew the screws that secure the cabinet to the washer frame to remove the cabinet.
Depending on your model, the cabinet might have spring clips that need to be released.
- Carefully lift the cabinet off the frame, exposing the internal mechanisms of the washer.
Step 5: Release the Tub Clips

The washing drum is held in place by tub clips. These clips may be metal or plastic.
- You can release them with a flathead screwdriver or a suitable tool. Gently pry them open.
This step requires patience and a steady hand.
Step 6: Remove agitator
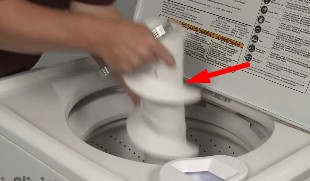
- Remove the agitator by giving it a sharp pull upwards.
- Remove the 7/16th bolt on top of the agitator drive block and lift the drive block off the agitator shaft.
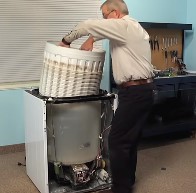
Step 7: Lift the Drum
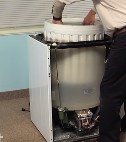
With the tub clips disengaged, you’re ready to lift the drum. This may be a two-person job due to the weight and awkwardness of the drum.

- Use a spanner wrench to loosen the left-hand threaded tub nut.
- Lift the tub out and set it aside
Place it aside on a soft surface to prevent scratches or damage.
Remove drum Amana front load washer
Now get ready to remove the drum from your Amana front load washer and follow the below process:
Step 1: Unplug and prepare
Similar to the top load model, start by disconnecting the power and water supply.
Front load washers have a rubber door boot seal. Gently peel this back to reveal the retaining ring that holds the front of the drum in place.
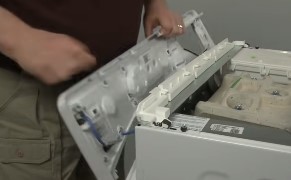
Remove the control panel
Step 2: Remove the Retaining Ring
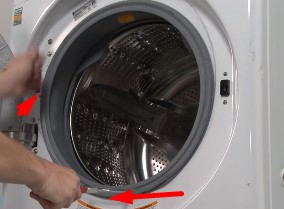
- Using a pair of pliers, grasp the retaining ring and turn it counterclockwise to loosen it. This may require some force, so be persistent.
Once loosened, carefully slide it off the front of the drum.
Step 3: Take Off the Door Boot Seal

Peel back the rubber door boot seal from around the drum. This exposes the screws securing the front panel.
- Remove these screws, and carefully set them aside.
Once the screws are out, peel back the door boot seal further to reveal the front of the drum.
Now unscrew the screw that secures the front panel and remove the front panel.
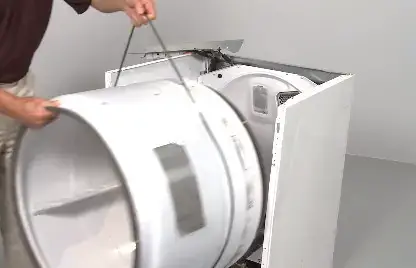
Step 4: Remove the Drum
With the front panel removed, check the drum housing for any additional screws or clips. Release these, and carefully lift the drum straight up.
Note: Front-load drums can be heavy, so consider having a second person assist you to avoid any accidents.
Wrapping up
So, don’t worry if you’re searching for your Amana washer drum removal method.
Whether you’re dealing with a top load or front load model, we’ve got you covered.
With the step-by-step instructions in this article, detach the drum from your Amana washer easily and perform the repair or maintenance you need.
Leave a Reply